
Gluten-free bread is not always easy to make. You need a mixture of different flours, yeast (fresh, dry, active …), starch, guar gum or other such thing.
I am rather fond of keeping things simple. Ideally, I don’t have to buy ingredients that I don’t usually use. Then it has to be good.
I’m particularly fond of Sorghum flour. I find the taste to be sweet and subtle. It is close to wheat and, for new followers (celiac or not) of gluten-free, it is ideal. Don’t tell me about the lingering or tasteless taste let alone the cardboard taste that commercial breads have. Some even leave a strange sensation in the mouth and some have a texture that is sometimes too dense, sometimes too soft.
Gluten Free Bread
In short, life with gluten-free bread is not easy.
I love my Vitality seed bread 
or my granola bread (seeds, nuts and dried fruits) but not for making a sandwich. They are too dense and crunchy.
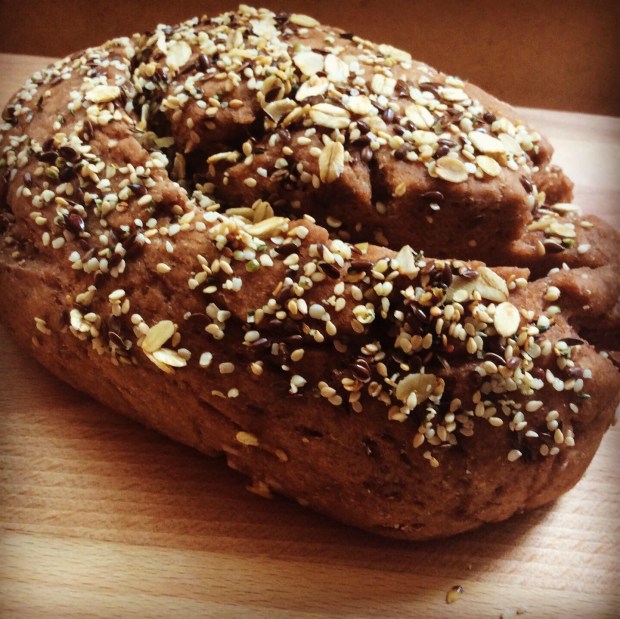
Sandwich Bread
I also love and make an almond flour bread  It is as soft as you want and is suitable for small sandwiches. Very small because it is a bread without yeast. So when I want a bigger sandwich, I make one with sorghum flour for which you will find the recipe below. This one is malleable enough that I can easily shape it into whatever shape I want; baguette, small loafs, big loaf …
Sorghum
Sorghum Flour Sandwich Bread
For a loaf or 2-3 small baguettes or 6 small loaves, you need …
- 200g sorghum flour
- 100g cassava / tapioca / cassava flour (or starch)
- 4g salt
- 15g fresh baker’s yeast or 1 sachet of yeast
- 4g sugar
- Lukewarm water
- 10g psyllium
- 330ml water
—
- In a small bowl, put the yeast, sugar and a some lukewarm water. Mix lightly then let stand 10min so that bubbles forms.
- In a bowl, put the psyllium and water. Let it take. The psyllium will gel and absorbe water.
- In a large bowl, add the sorghum flour, cassava flour and salt. Mix. Dig a well in the center and pour in the yeast and psyllium. Mix with your hands then knead. The dough will stay a bit sticky.
- Leave to rise for a few hours in the bowl covered with a damp cloth. I put it in the oven with only the light on. Its heat helps the dough to rise, especially when the outside temperature is not very high.
- Take out of the oven and degas while kneading again. It is at this stage that I shape or separate the dough to make loaves, a baguette or a square bread. This is also when I add seeds or cut it to give it a nice decoration. You do as you want.
- I then place my “formed” dough on a sheet protected with a silicone film or in a pre-oiled mold. I put the damp cloth back on top and let it rise for another hour in the oven with the light on.
- I remove it from the oven to preheat it to 200C. I bake, without the cloth, for about 30 min or until it is golden brown and a muffled sound is heard when I knock on it. Let cool.
In Health!
Chantal
Pains sans gluten
Bref, pas facile la vie du pain sans gluten. J’adore mon pain de graines Vitalité ou encore mon pain granola (graines, noix et fruits secs) mais pas pour faire un sandwich. Il sont trop dense et croustillant.
Pain pour sandwich
Je fais aussi un pain à la farine d’amande
Il est moelleux à souhaits et peut convenir pour faire des petits sandwiches. Tout petit parce que c’est un pain sans levure. Par contre, lorsque j’ai envie d’un sandwich plus conséquent, je fais plutôt celui à la farine de sorgho dont tu trouveras la recette ici-bas. Celui-ci est suffisamment malléable pour que je lui donne la forme que je veux très facilement ; baguette, boule, miche…
Sorgho
Évidemment si tu doit surveiller l’indice glycémique des ingrédients ou aliments que tu manges, le sorgho n’est pas pour toi. Effectivement, la farine de Sorgho a un IG élevé puisqu’il est de 65. Cela est quand même moins élevé que la farine de riz (95 pour le blanc, 75 pour le complet) que l’on retrouve dans presque toutes les recettes de pains sans gluten.
Allez! Au fourneau!
Pain sandwich à la farine de sorgho
Pour un pain ou 2-3 petites baguettes ou 6 miches, tu as besoin de…
- 200g farine sorgho
- 100g farine (ou fécule) de manioc/tapioca/cassava
- 4g sel
- 15g levure de boulangerie fraîche ou 1 sachet levure
- 4g sucre
- Eau tiède
- 10g psyllium
- 330ml eau
—
- Dans un petit bol, mettre la levure, le sucre et un peu d’eau tiède. Mélanger légèrement puis laisser reposer 10min pour que des bulles se forment au-dessus.
- Dans un bol, mettre le psyllium et l’eau. Laisser prendre. Le psyllium deviendra gélifié et aura absorbé l’eau.
- Dans un grand bol, ajouter la farine de sorgho, la farine de manioc et le sel. Mélanger. Creuser un puit au Centre et y verser la levure et le psyllium. Mélanger avec les mains puis pétrir. La pâte restera un peu collante.
- Laisser lever quelques heures dans le bol couvert d’un linge humide. Moi, je le mets dans le four avec seulement la lumière allumée. Sa chaleur aide à faire lever la pâte surtout quand la température extérieure n’est pas très élevée.
- Sortir du four et dégazer en pétrissant de nouveau. C’est à cette étape que je forme ou sépare la pâte pour en faire des miches, une baguette ou un pain carré. C’est aussi à ce moment que j’y ajoute des graines ou que je l’entaille pour lui donner une jolie décoration. Tu fais comme t’as envie.
- Je dépose ensuite ma pâte “formée” sur une plaque prémuni d’un film en silicone ou dans un moule pré huilé. Je remet le linge humide et le laisse lever encore une heure dans le four avec la lumière.
- Je le retire du four pour préchauffer celui-ci à 200C. J’enfourne, sans le linge, environ 30 min ou jusqu’à ce qu’il soit bien doré et qu’un son sourd s’entend lorsque je frappe dessus. Laisse refroidir.
Santé!
Chantal
